


 Baitcasting Reel


[SHIMANO] Level Wind Cap LVCAP-18BTM for 22 ALDEBARAN BFS, 24 Metanium DC, 23-20 Metanium, 23 ANTARES DC, 22-18 Bantametc.
![Photo1: [SHIMANO] Level Wind Cap LVCAP-18BTM for 22 ALDEBARAN BFS, 24 Metanium DC, 23-20 Metanium, 23 ANTARES DC, 22-18 Bantametc.](https://www.hedgehog-studio.co.jp/data/hedgehog-studio/product/20181105_b633a0.jpg)
Description
This is a new version Level Wind Cap useful for various models of SHIMANO baitcasting reels.
Color
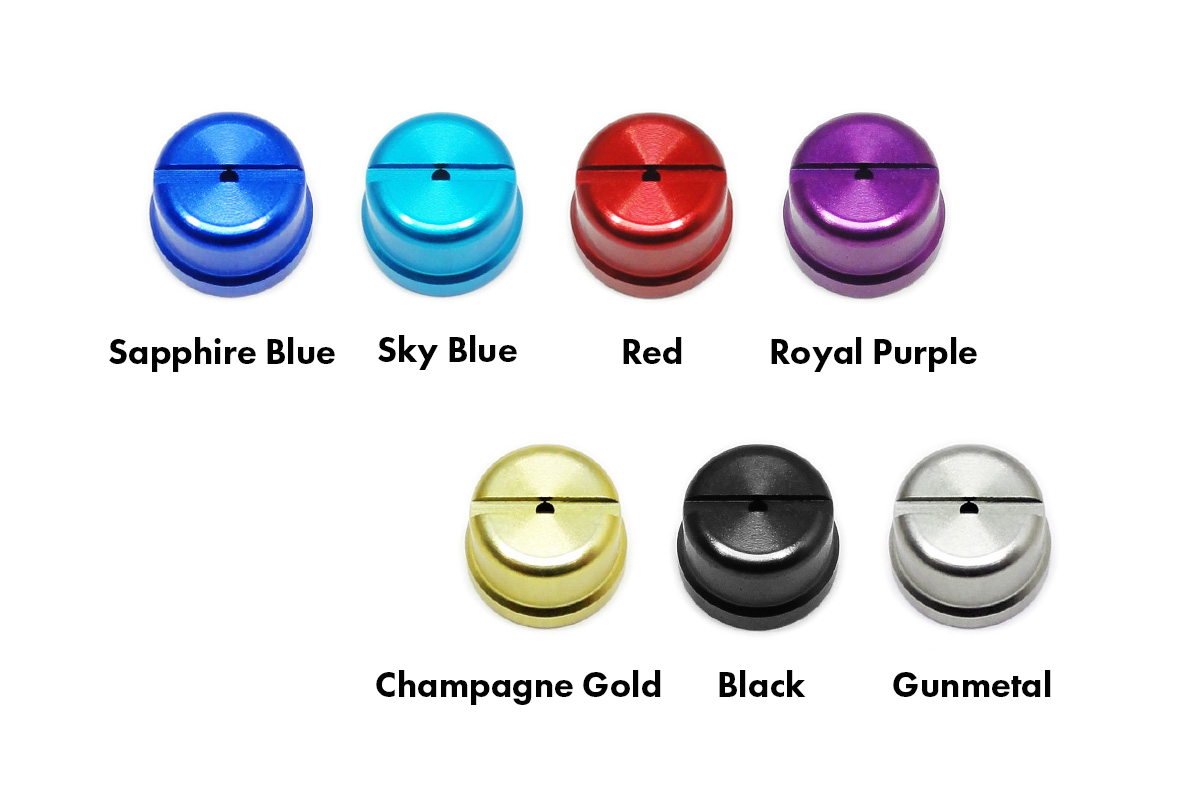
Top row from left, SAPPHIRE BLUE, SKY BLUE, RED, ROYAL PURPLE
Bottom row from left, CHAMPAGNE GOLD, BLACK, GUNMETAL
If you replace the Level wind cap, Level wind shaft, and Level wind pipe, you can have a unified color.
Compatibility
- 25 ANTARES DC
- 19 ANTARES
- 23 ANTARES DC MD
- 21 ANTARES DC
- 19 ANTARES
- 18 ANTARES DC MD
- 16 ANTARES DC
- 12 ANTARES
- 06 ANTARES AR
- 06 ANTARES SC
- 11 CALCUTTA CONQUEST 50DC
- 04 CALCUTTA CONQUEST 50S
- 01 CALCUTTA CONQUEST 50
- 22 ALDEBARAN BFS
- 18 ALDEBARAN MGL
- 16 ALDEBARAN BFS/BFS XG
- 15 ALDEBARAN
- 12 ALDEBARAN BFS LTD
- 12 ALDEBARAN BFS
- 09 ALDEBARAN Mg
- 24 Metanium DC
- 23 Metanium
- 22 Metanium SHALLOW EDITION
- 20 Metanium
- 16 Metanium MGL
- 15 Metanium DC
- 13 Metanium
- 08 Metanium Mg DC
- 07 Metanium Mg
- 22 Bantam
- 18 Bantam MGL
- 24 Scorpion MD 200
- 24 Scorpion MD 300
- 21 Scorpion DC
- 21 Scorpion MD
- 19 Scorpion MGL
- 17 Scorpion BFS XG
- 17 Scorpion BFS
- 17 Scorpion DC
- 16 Scorpion 70
- 14 Scorpion
- 04 Scorpion Mg 1000
- 00 Scorpion 1000
- 25 SLX BFS
- 24 SLX
- 23 SLX DC
- 22 SLX DC XT
- 21 SLX BFS
- 20 SLX DC
- 19 SLX MGL
- 22 CURADO DC
- 15 CURADO/CURADO I
- 22 GRAPPLER BB
- 21 GRAPPLER
- 17 GRAPPLER
- 16 GRAPPLER BB
- 22 EXSENCE DC
- 20 EXSENCE DC SS
- 17 EXSENCE DC
- 13 EXSENCE DC
- 12 EXSENCE DC
- 22 ENGETSU BB
- 21 ENGETSU
- 17 ENGETSU
- 16 ENGETSU
- 17 ENGETSU BB
- 16 ENGETSU BB
- 17 Stile SS
- 16 Stile
- 17 Stephano SS
- 16 Stephano
- 13 Stephano
- 12 Stephano
- 18-20 BAY GAME
- 14 BAY GAME
- 16 CASITAS MGL
- 15 CITICA/CITICA I
- 18 BASS RISE
- 17 BASS ONE XT
- 20 GENPU
- 20 GENPU XT
- 17 GENPU XT
How to install
Installation instructions are not included, please refer to the instructions below.
The installation method differs from reel to reel, but as a typical example, we will explain it for 13 Metanium.
Remove the screw from the handle lock.
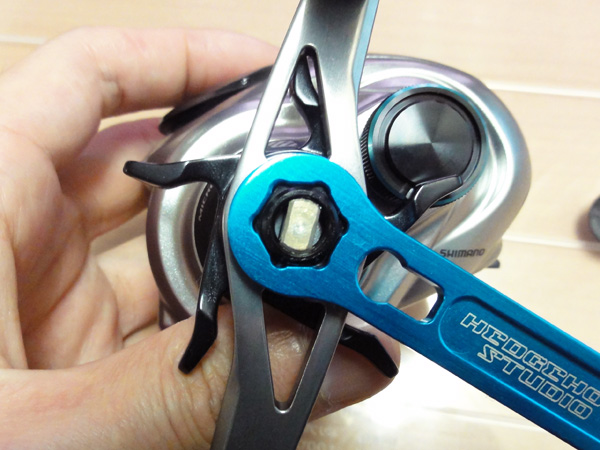
Remove the nut with a wrench.

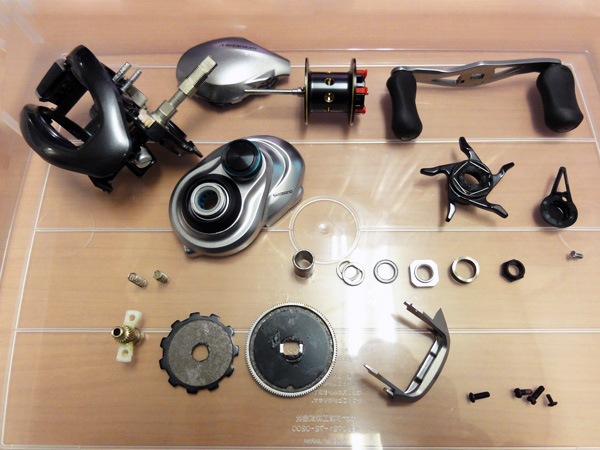
Remove the handle, sterndrag and spool.
Keep the washers and nuts in the same direction as they are removed for easier assembly.
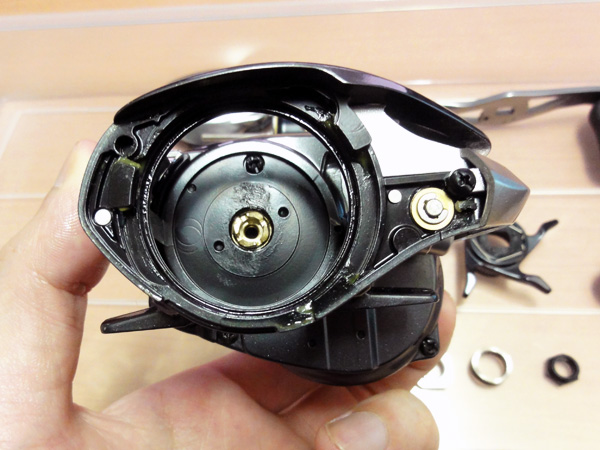
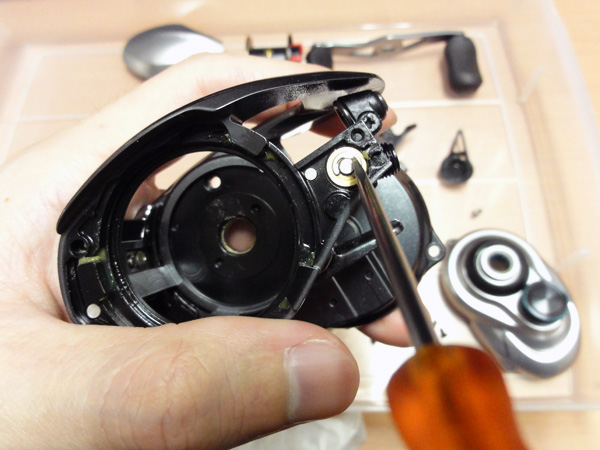
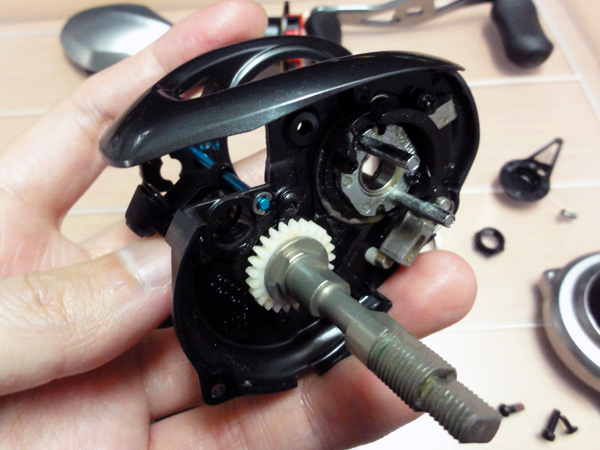
Remove the screws from the body.
Remove the pinion gear and drive gear.
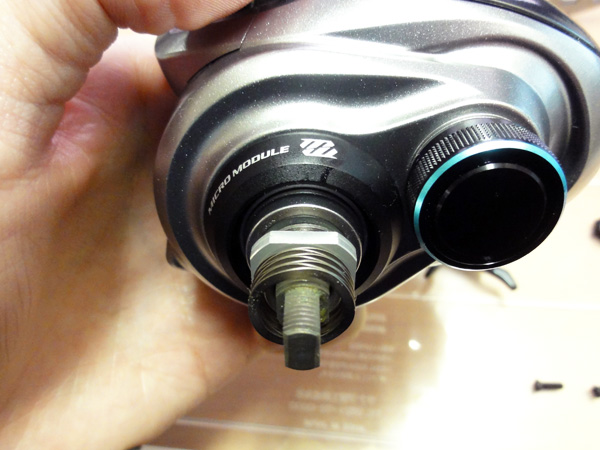
Remove the level-wind cap.
A large flat-blade screwdriver is recommended.
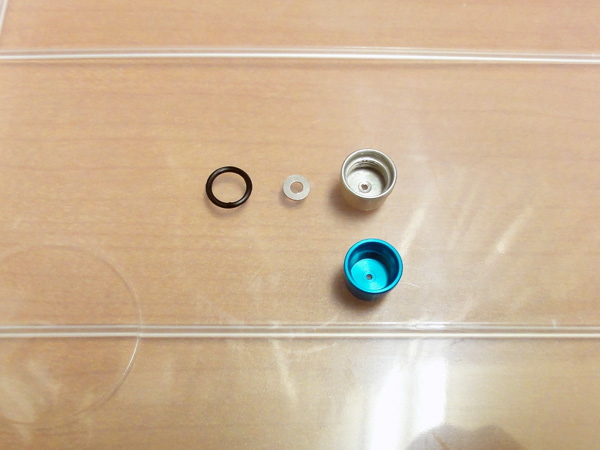
The level wind cap comes with a rubber ring and washer, so reuse these genuine parts.
Remove the E-ring from the level-wind pipe.
A thin flat-blade screwdriver is recommended.
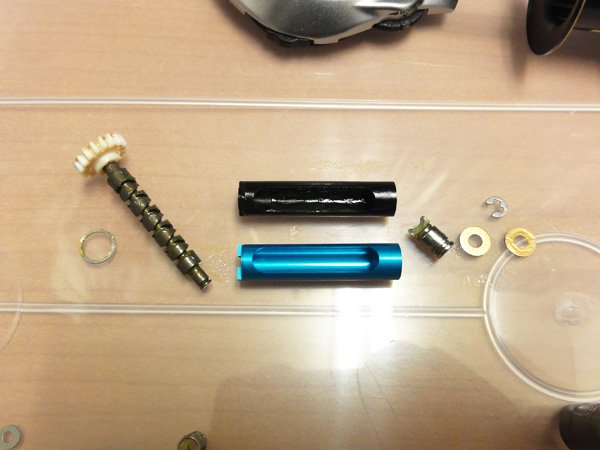
Disassemble the level wind pipe.
Remove the E-ring from the level wind shaft with a thin flat head screwdriver.
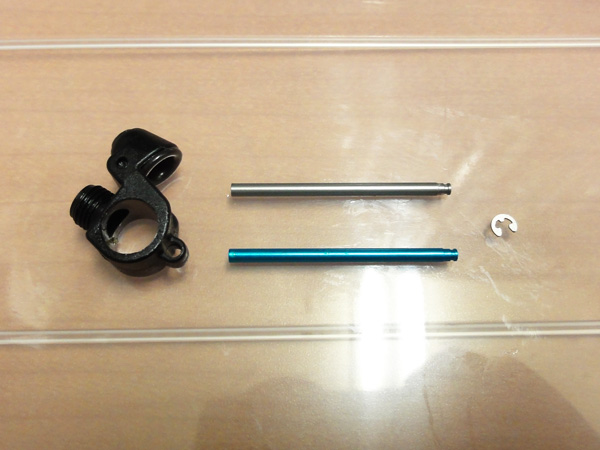
If you remove the levelwind shaft, you can also remove the levelwind body.
Now, let's start assembling in the reverse order of disassembly.
First is the level wind shaft.
Install the levelwind pipe.
Install the level wind cap.
Don't forget to install the rubber ring and washer.
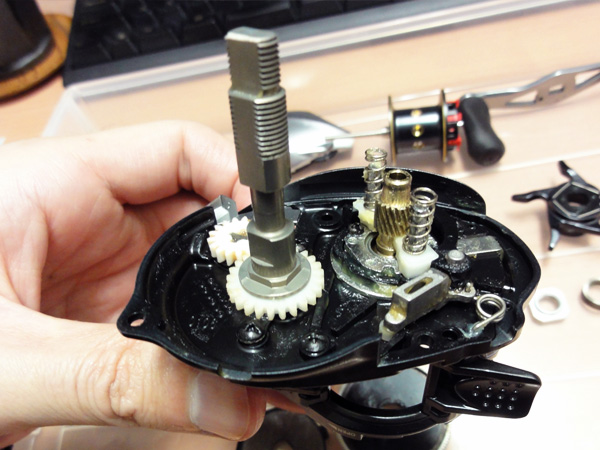
Install the pinion gear.

Install the drive gear.
Install the inner tube.

Install the side cover and secure with screws from the other side.
If you are replacing the screws with duralumin screws, we recommend using a special screwdriver.
The two screws in the body can be replaced with duralumin screws.
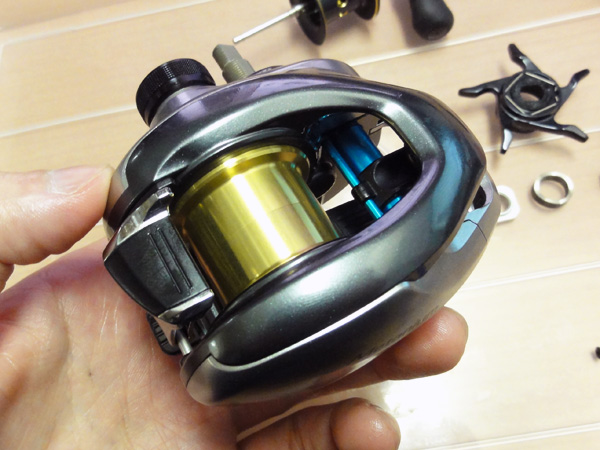
Lightweight shallow groove spools can also be installed.
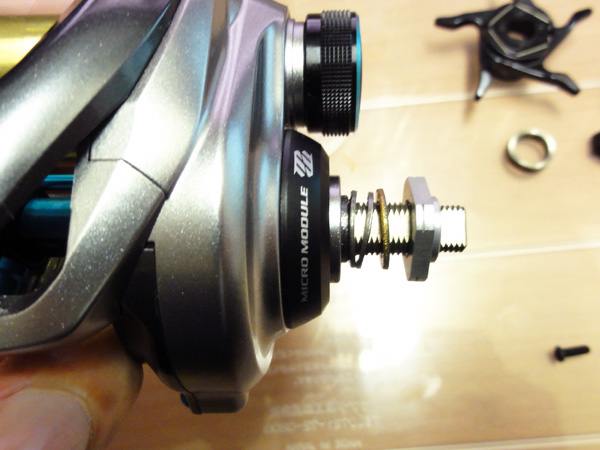
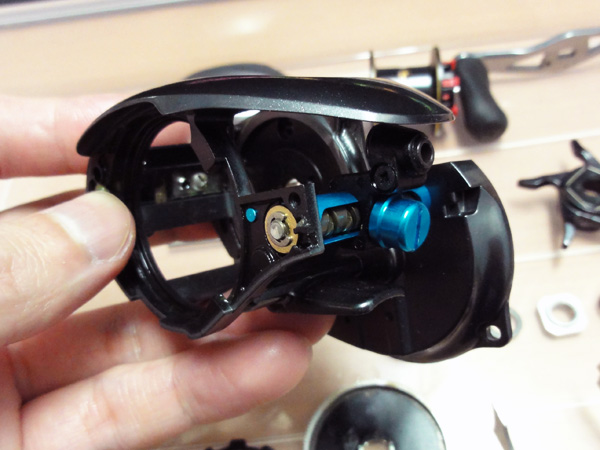
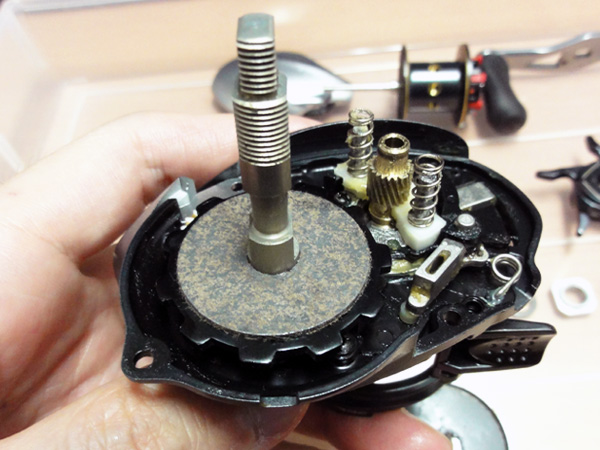
Please refer to the photo for the position of the washer inside the drag.
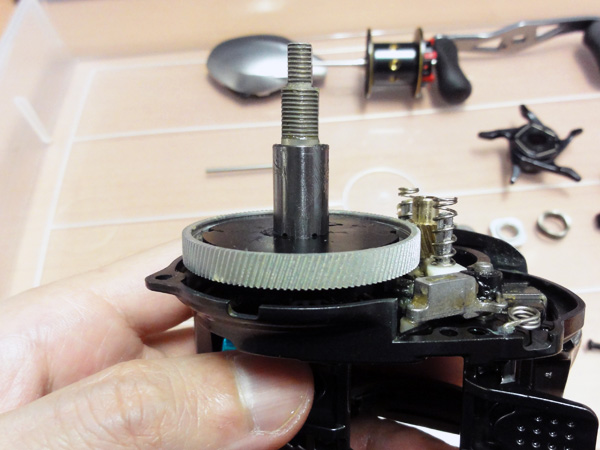
Align the holes in the drag and the sound board so that they are straight and parallel.
The drive gear shaft and nut should also be straight and parallel.
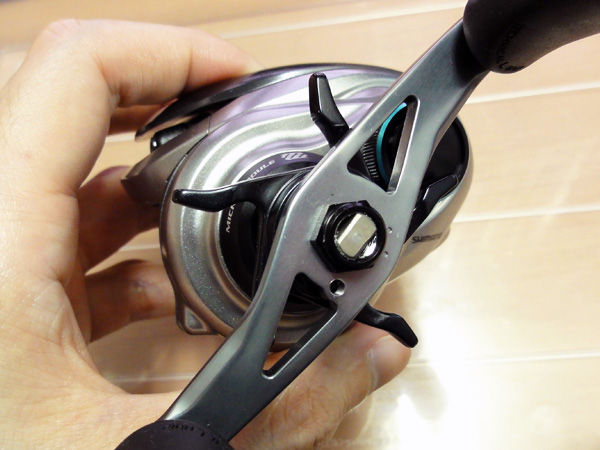
After aligning the holes and installing the drag, secure it with the nut.
Install the retainer. The screws can be replaced with duralumin screws.

Supplemental Explanation
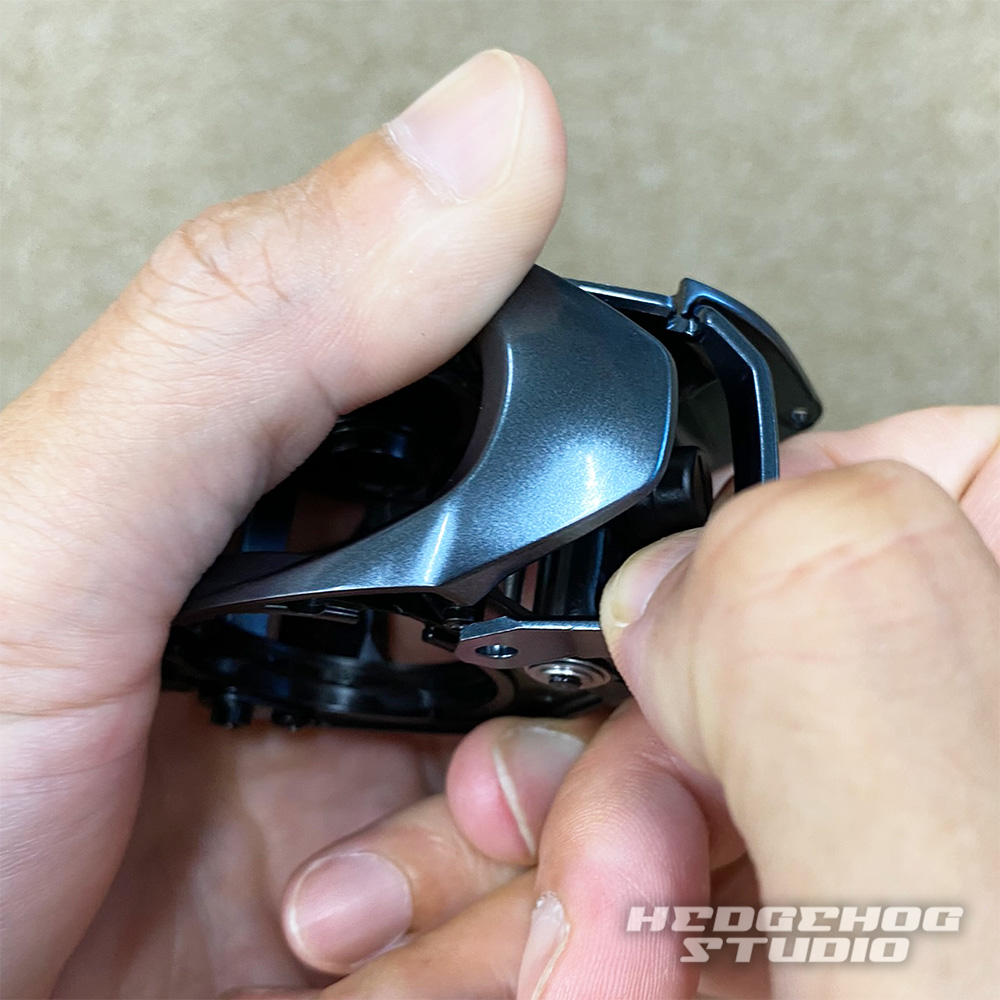
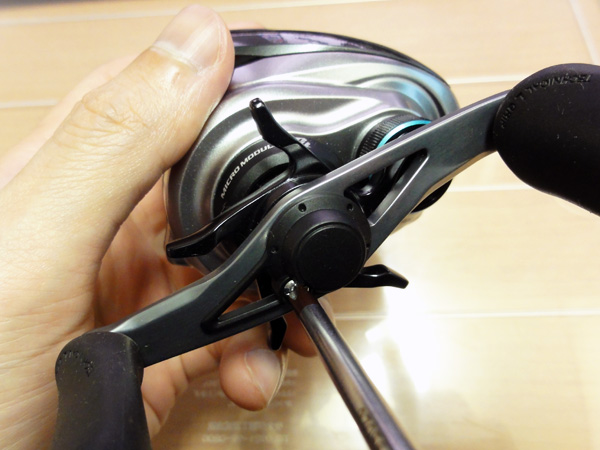
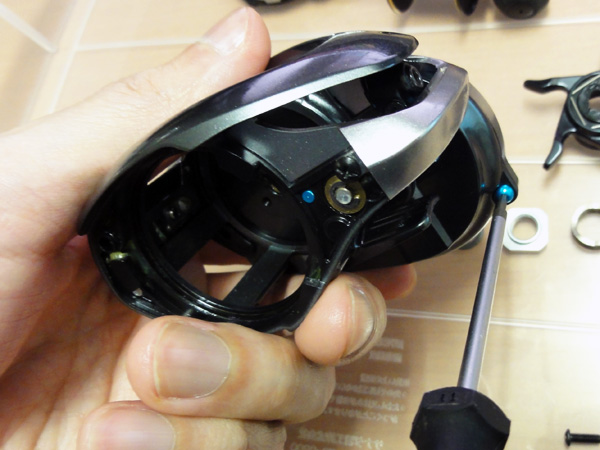
22 ALDEBARAN BFS, but the front cover, called the level wind guard, is difficult to remove at first.
It can be removed by pulling on the opposite side of the handle to lift it off, being careful not to damage the parts.
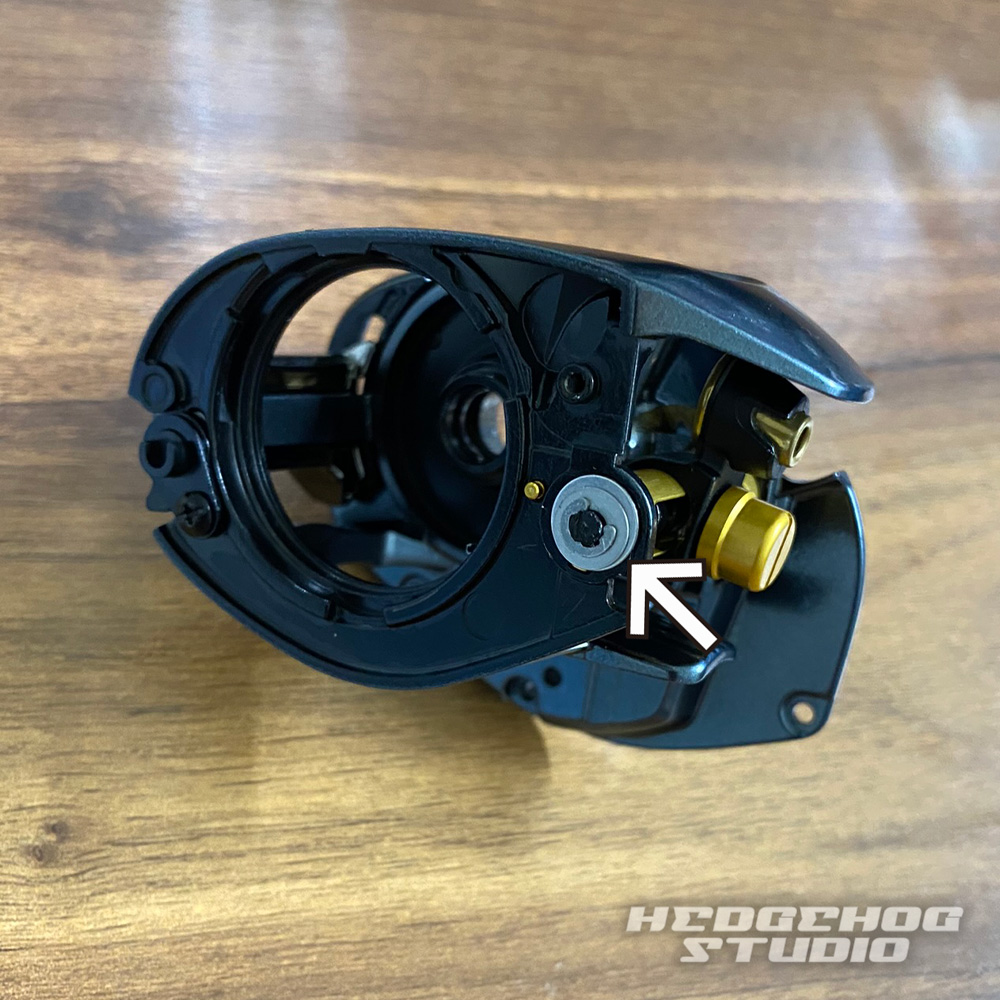
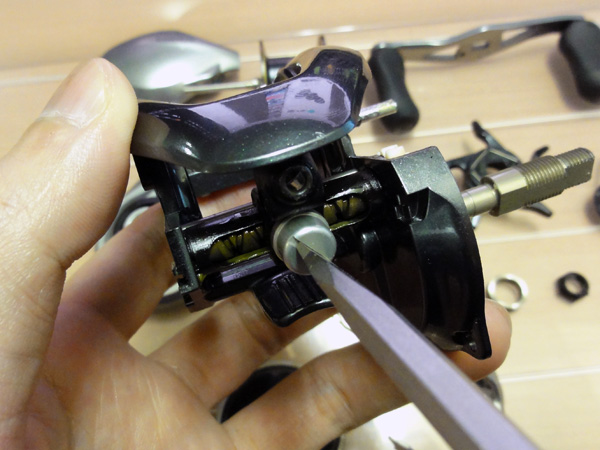
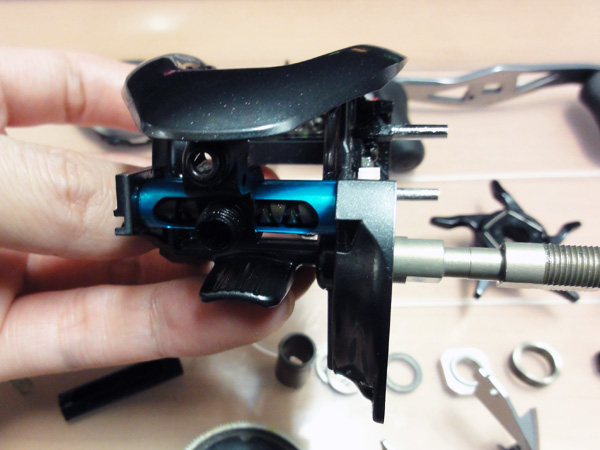
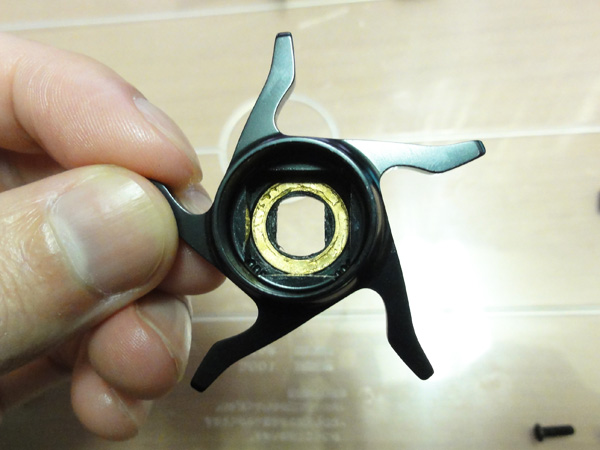
Depending on the individual reel, the rotation of the worm shaft gear may feel sluggish when the level wind pipe is installed.
If this is the case, try removing the middle washer out of the three washers that are under the E ring in the arrow section.
Smooth rotation.
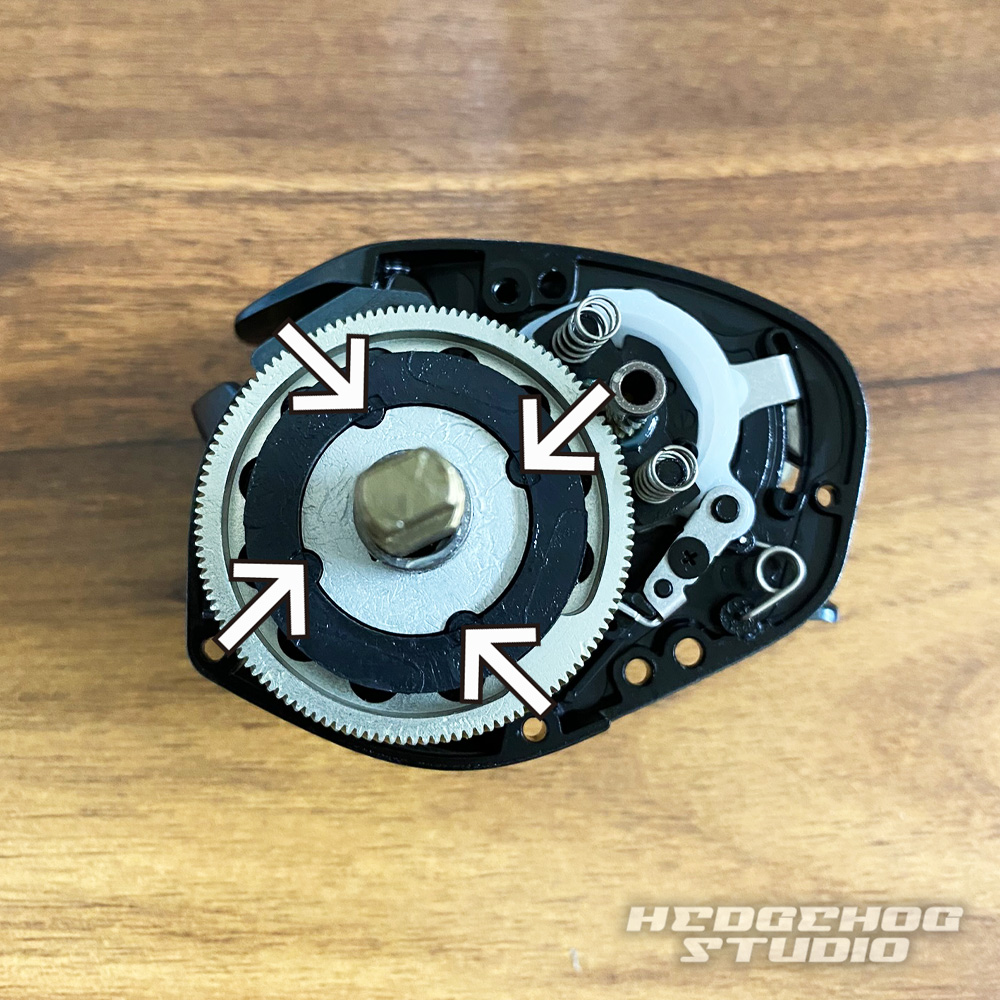
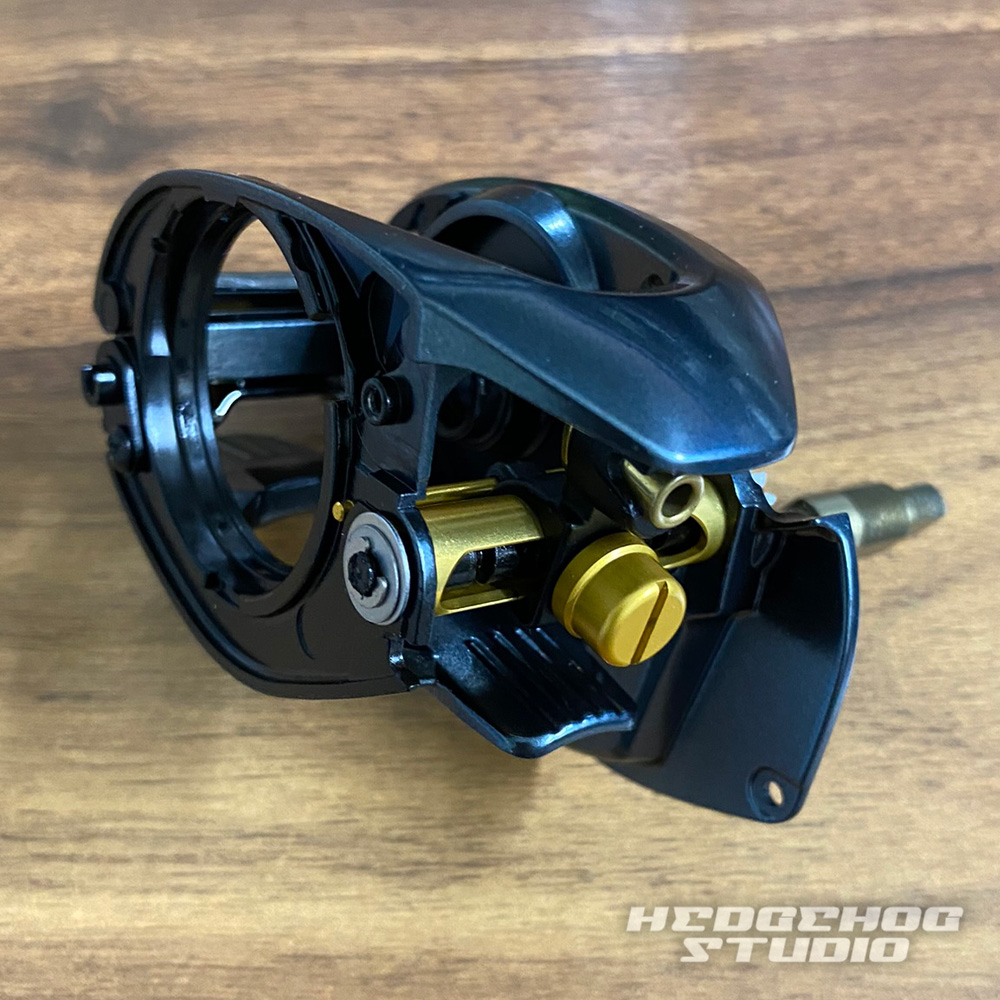
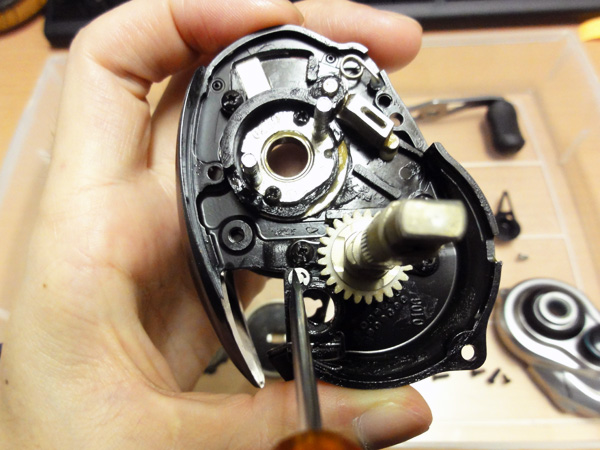
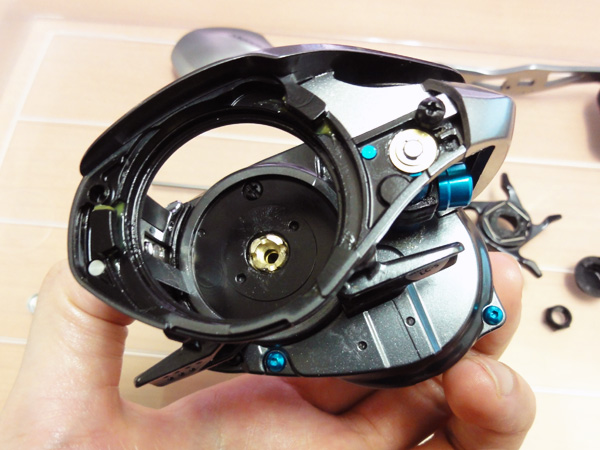
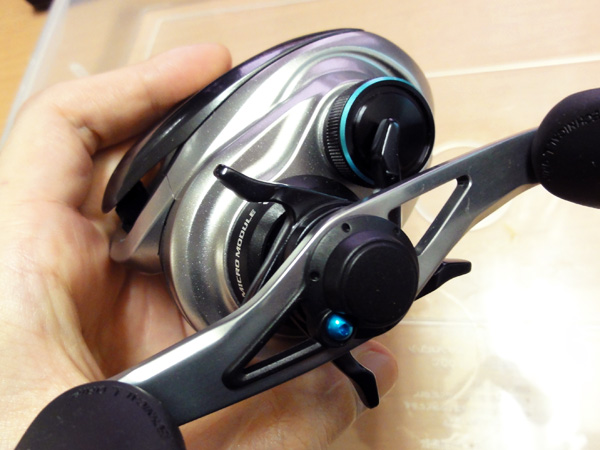
In the case of a drive gear structure like the one in the photo, make sure that the arrowed part is firmly aligned and engaged all the way to the back.
The side covers cannot be tightened with the plate in a floating position.
![[Avail] SHIMANO Mechanical Brake Knob BCAL-22ALD for 22 ALDEBARAN BFS](https://www.hedgehog-studio.co.jp/data/hedgehog-studio/_/70726f647563742f32303233303332305f3139313565322e6a7067003230300000660066.jpg)
![[SHIMANO] Level Wind Shaft LVSH-18BTM for Bantam, Metanium](https://www.hedgehog-studio.co.jp/data/hedgehog-studio/_/70726f647563742f32303139303330345f3130663236642e6a7067003230300000660066.jpg)
![[SHIMANO] Level Wind Pipe LVPIPE-22ALD for 22 ALDEBARAN BFS, 15-18 ALDEBARAN, 13-16 Metanium, 14-17 CHRONARCH](https://www.hedgehog-studio.co.jp/data/hedgehog-studio/_/70726f647563742f32303232303732315f6334613164612e6a7067003230300000660066.jpg)
![[SHIMANO] Level Wind Pipe LVPIPE-18BTM (3-Piece Set)](https://www.hedgehog-studio.co.jp/data/hedgehog-studio/_/70726f647563742f32303230303232325f3239653539362e6a7067003230300000660066.jpg)