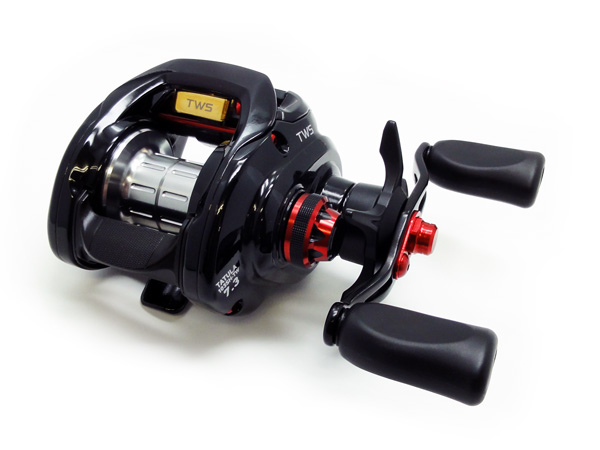
[DAIWA] Level Wind Shaft 【TATULA】 GOLD
[DAIWA] Level Wind Shaft 【TATULA】 GOLD
Our Selling Price:
US$5.09
[Regular Price:
US$7.26]
Retail Price:
US$8.28
Item Description
| Description of the product |
This item is Level Wind Shaft for TATULA, made of duralumin by machine
cut..
Weight : approx. 0.28g
(genuine product : approx. 0.80g)
|
| Compatibility |
■TATULA - USA -
( 100HL, 100HSL, 100H, 100HS, 100P )
■TATULA TYPE-R - USA -
( R100H, R100XS, R100HL, R100XSL )
■TATULA - Japan -
( 103H-TW, 103HL-TW, 103SH-TW, 103SHL-TW, 103XH-TW, 103XHL-TW )
|
| Instructions |
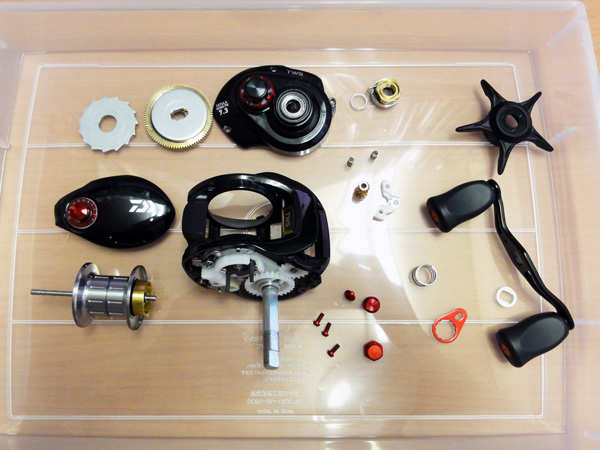
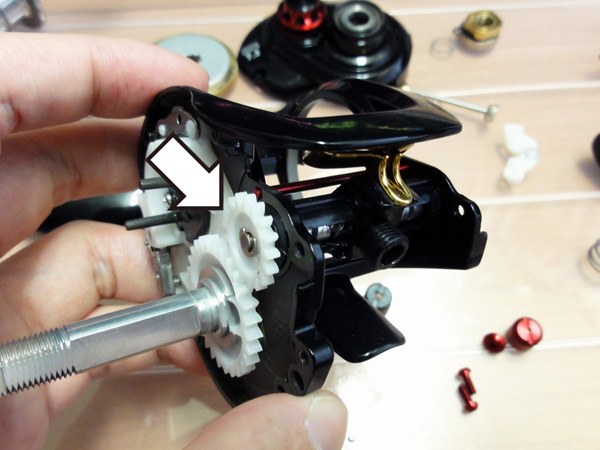
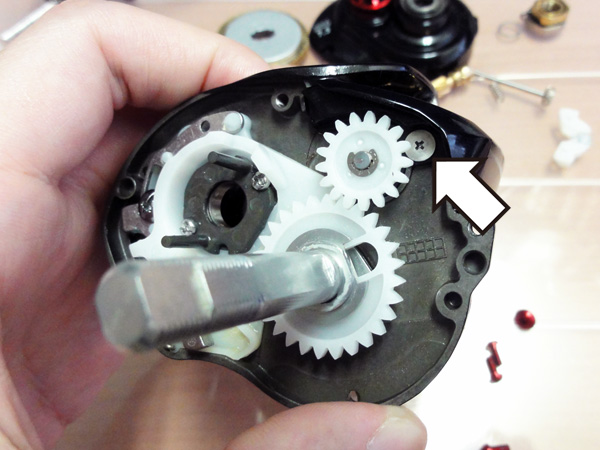
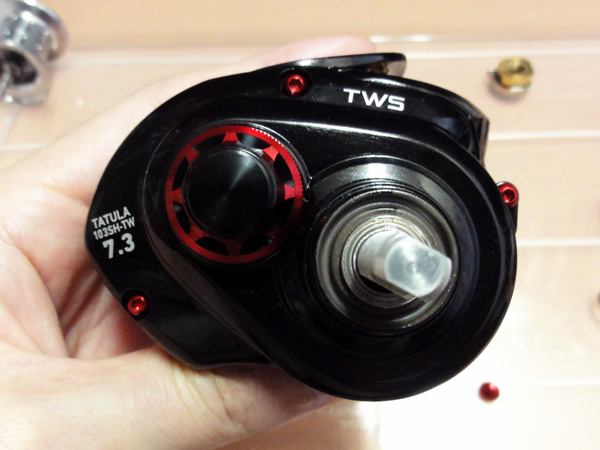
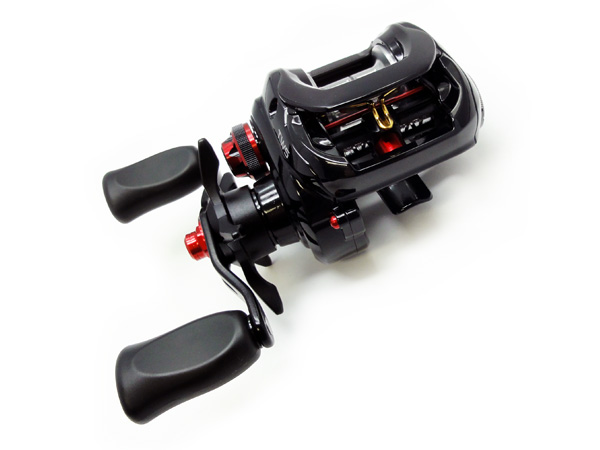
First take your reel apart as pictured above.
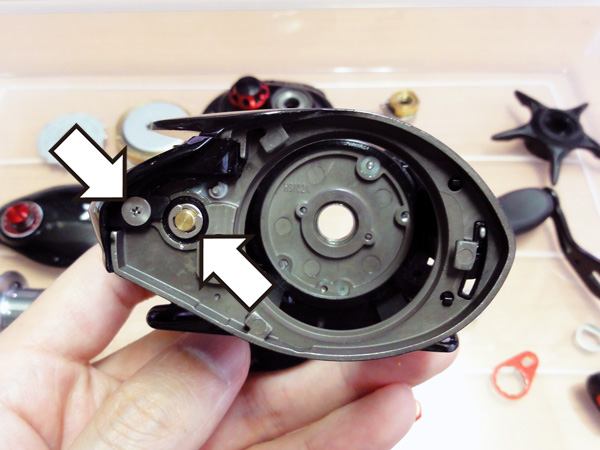
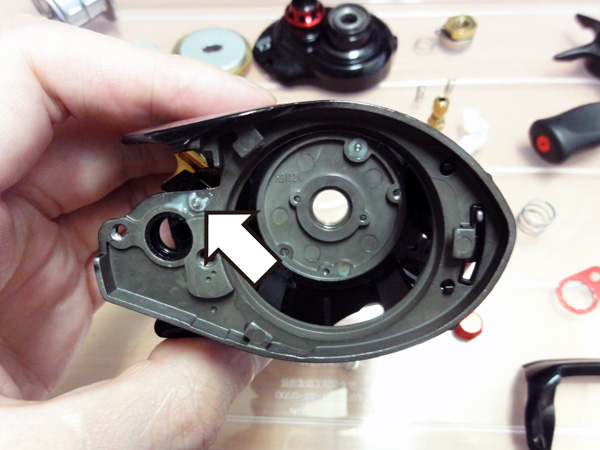
Take off the arrowed screw and E-shaped retainer with an extra-fine driver.
This E-shaped retainer is : E-2.5
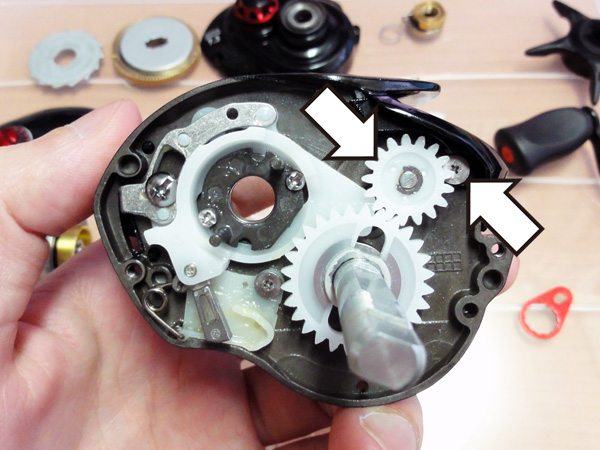
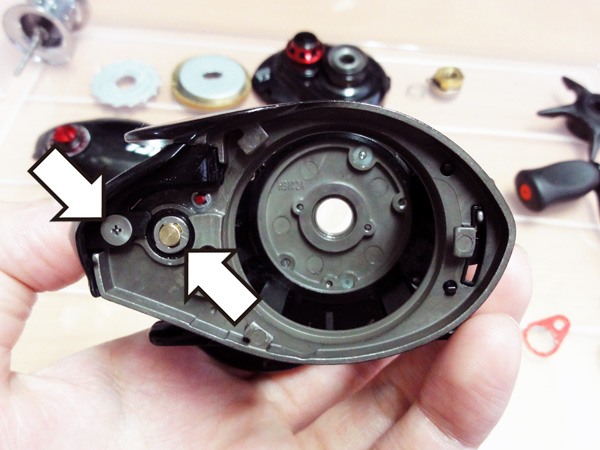
If you try to install bearings on the Worm Shaft, please remove a E-shaped retainer
on the small white gear.
This E-shaped retainer is : E-2.0
After removing the white gear, you can take off the screw underneath.
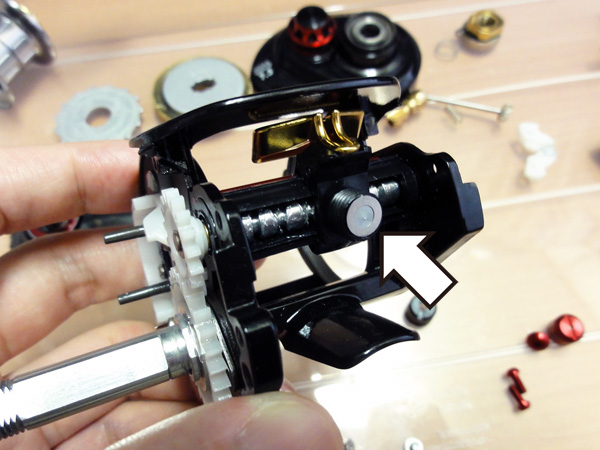
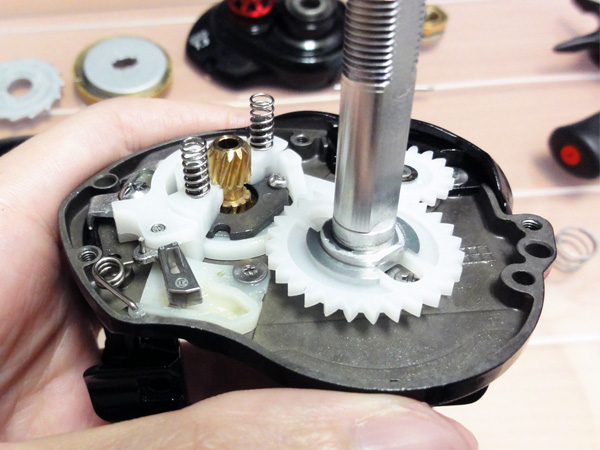
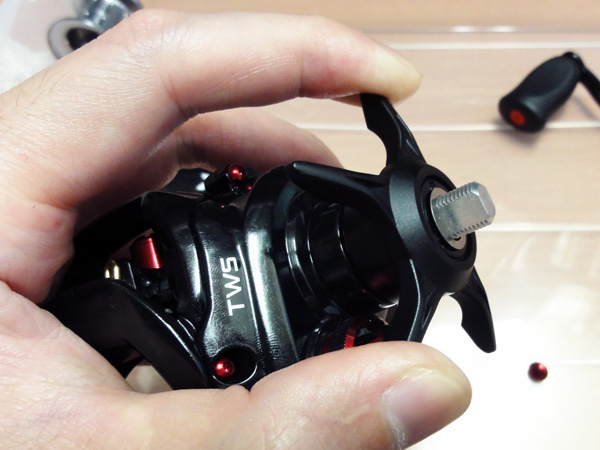
The Front Cover is detachable by taking off the screws on its both side.
After removing the Front Cover, remove the Level Wind Cap,
and remove a washer and a pin from inside.
Then you can take the Warm Shaft off the main unit.
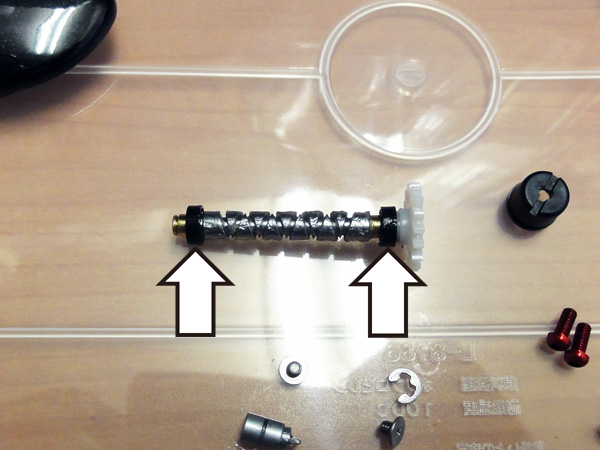
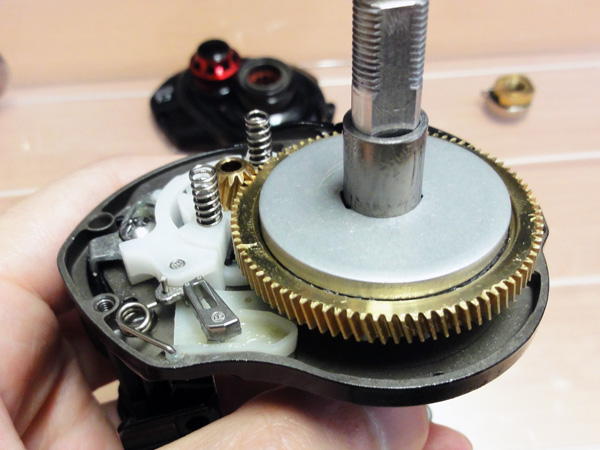
This is an original Worm Shaft.
These two black plastic collars can be replaced with beaings.
After replacing with bearings, the retrieving feel gets smoother.
>> Worm Shaft +2BB
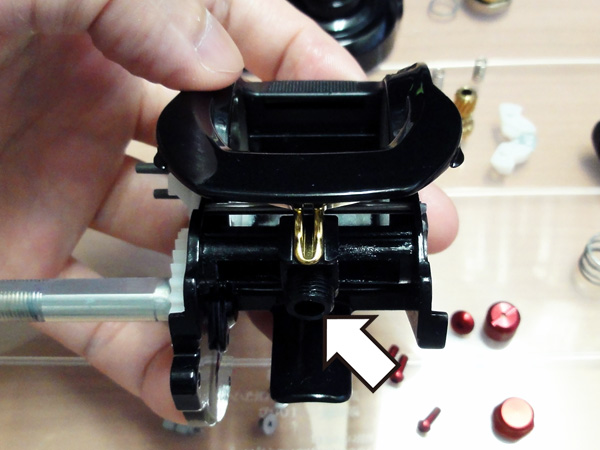
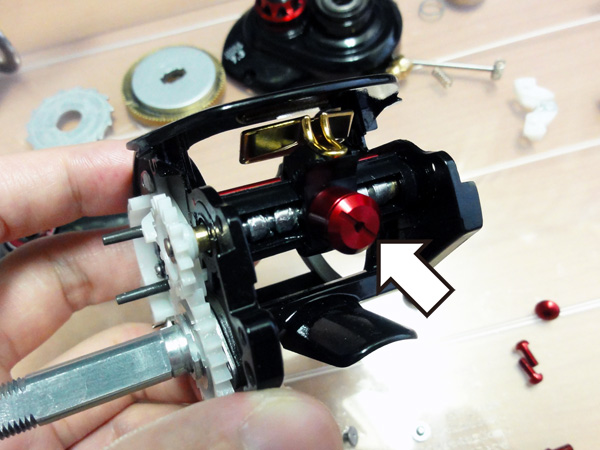
Take off the small E-shaped retainer with an extra-fine driver in order
to replace
Level Wind Shaft.
This E-shaped retainer is : E-1.2
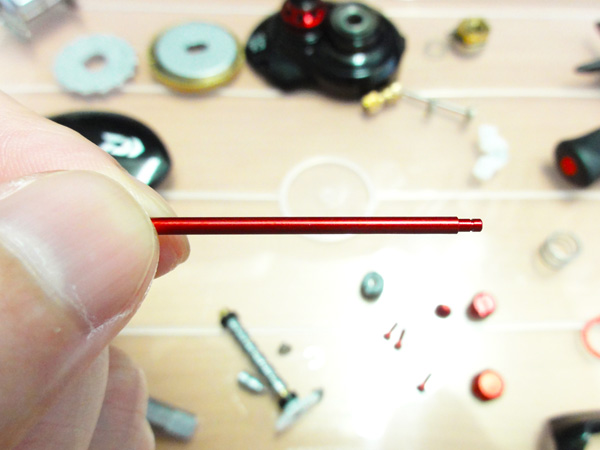
Replace with our custom part.
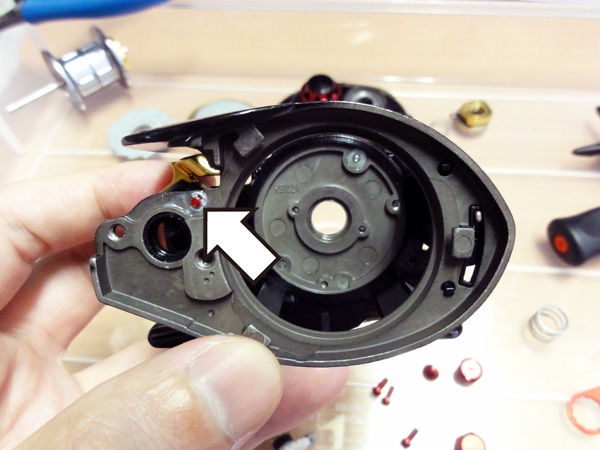
After replacing the Level Wind Shaft, put the E-shaped retainer back to
fix it.
Put the Warm Shaft back.
At this point, make sure not yet to fix the E-shaped retainer of the other side.
Set the pin and washer on the Level Wind.
Put a Level Wind Cap on.
>> Level Wind Cap
Then, put the Front Cover back.
Tighten the arrowed screw under the small white gear first.
And tighten the screw of the side cover, finally fix the E-shaped retainer.
* If fixing the E-shaped retainer before the screw of the side cover,
you cannot tighten the screw of the gear side.
Put the pinon gear and others on.
Then, put the drive gear and others on.
Set the gearbox cover and tighten screws to fix it.
Several screw colors are available.
>> Duralumin Screw Set

To install a drag properly, make sure to install the following parts in the right order.
From the left : Bearing - Washer (silver) - Clicking-sound folder - Plate
washer x 2
- Washer (gold) - Nut - Spring
Hold the drag as pushing it down to set a handle.
Fix a Handle Lock Nut and a Retainer to finish up.
>> Handle Lock Nut Set B-type
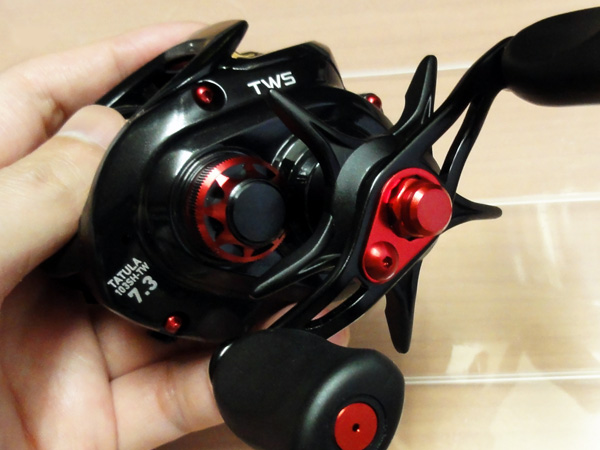
This is how it looks with all color parts.
Basically any color parts go nice on this glossy black body.
| |

![Photo1: [DAIWA] Level Wind Shaft 【TATULA】 GOLD (1)](https://www.hedgehog-studio.co.jp/phone/data/hedgehog-studio/product/20140518_64207d.jpg)